
The Manage Users page is a tool that allows administrators to invite and manage users for their account.
Administrators who use Configure to manage their account can manage users. To access the manage users app, simply sign into configure.phone.com with your login information, then select Users from the left Navbar.
FAQs
What is a User?
A user is anyone who needs to make or receive business calls using your account at Phone.com. A user will also access your Company Inbox, which includes Web Calls, Messages, Voicemail, and Fax.
In most organizations, each employee who makes or receives calls will be a user. It also could be the owner, your business partner, an employee or a subcontractor that works as staff.
What is an Admin User?
Admin users also have access to My.Phone.com but also to the Configure app so they can change Phone.com global settings and invite other users.
Admin users can configure Phone.com global settings via the Configure App.
As such, they can:
- Configure users (e.g., invite new user, setup a user’s settings, provide a dedicated number to a user)
- Configure numbers (e.g., add more phone numbers, configure what happens when a call comes in)
- Configure the company settings (e.g., the company voicemail message, the company name and music on hold, etc.)
- Configure account and billing settings (e.g., update credit card information and preview invoices)
- Access the Phone.com Control Panel to manage advanced settings such as queues and advanced call routing rules
How do I change the Admin User?
If you need to change the admin user for your account, please contact our support team, they can do this for you.
What does it cost to add users?
Any users you added when you signed-up are included with your account; however, if you decide to add additional users (accessed from the Add Users Tab) will be charged. You can see the cost of our Basic, Plus and Pro plans here.
Which user plan should I choose?
Since your employees are performing different tasks in your organization, each person may require a different level of service. For example, the person who makes a lot of calls probably needs an unlimited plan, and it makes sense to upgrade a plan from Basic to Plus or Pro.
For another person who is a personal assistant answering calls when the business owner is not available, it makes sense to analyze how many minutes per month this person uses and upgrade or downgrade their plan accordingly.
If your employee started with Basic plan and now needs a video meetings bridge which is HIPAA compliant, his plan should be upgraded to Plus or Pro to get a matching video plan with HIPAA compliant and security options.
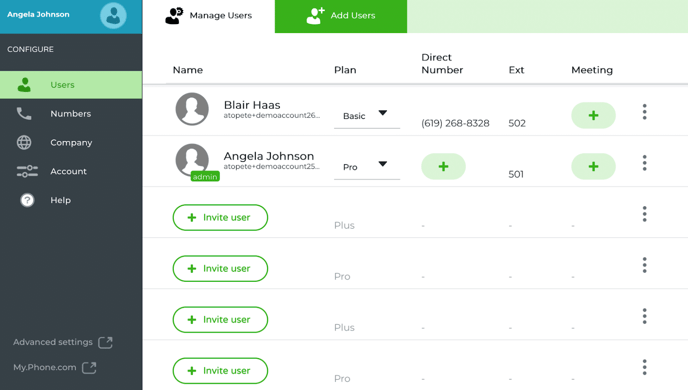
Manage Users
Overview
Once you sign in and are on the Users App, you will notice two tabs above, one is Manage Users, and the other is the Add Users tab. You will also notice yourself as an admin with a green admin tag next to your profile avatar. You may also notice additional user plan slots listed.
Name
This is the name that is assigned when you invite the user for the first time. Once you begin adding more users you will notice the users will be sorted based on their last name in alphabetical order. The name can be changed by accessing the Edit User option located within the Action Menu (looks like three vertical dots) To learn more about how to change a user’s name visit the Edit User section.
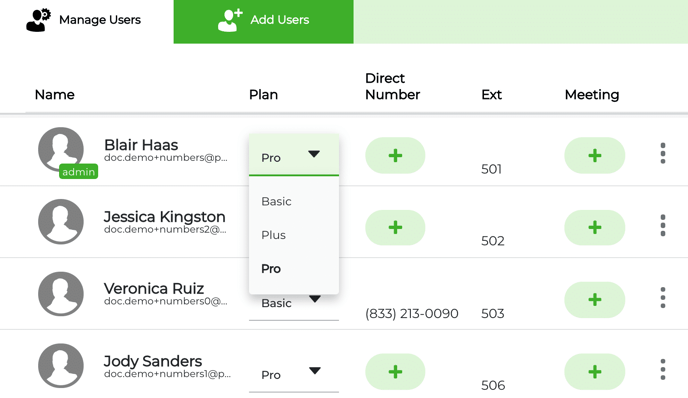
User Plan
The plan column will show the plan your users are currently signed up for. You can always change between any of the three available plans by selecting the drop-down list and selecting the one you wish to use for any user.
To learn what each plan provides, and so which one is right for your users, see our pricing page.
How to change a user plan
1. Open the Users page
2. Select the Manage Users tab
5. Click on the user you would like to adjust
6. In the plan drop-down, click on the plan selection (Basic, Plus, or Pro)
7. The Plan change is complete. Your next billing statements will reflect the change.
Direct Number
The “direct number” column will always show you any phone number that has been assigned to a user. So it’s a “dedicated number” for that user; any calls to that number will ring that user.
To assign a phone number, select the Plus sign and select from the list of unassigned phone numbers.
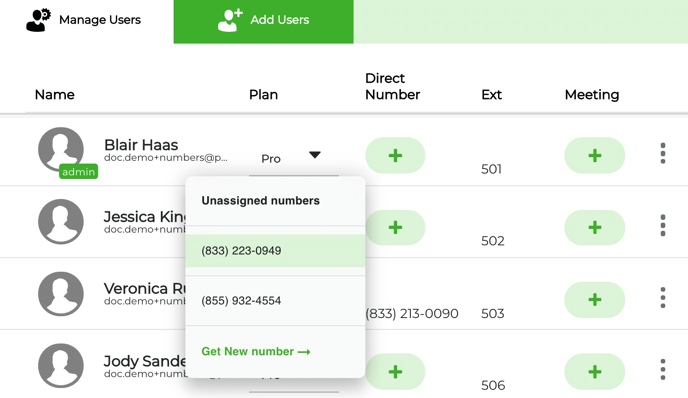
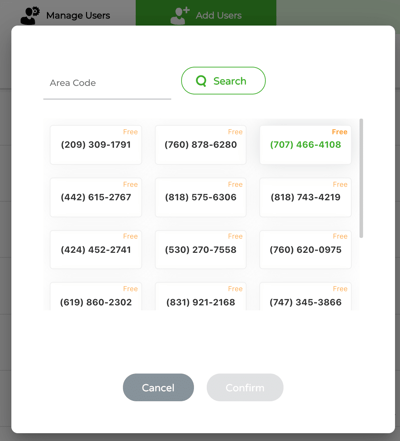
If you do not have any available phone numbers, you may select the Get New number option at the bottom and select the number from the pop-up window that appears. Once you choose the number, it will be automatically assigned to the selected user.
Important note: if your user is on a Base plan, you will incur a $4.99 per month charge for the additional number. Plus and Pro users get a number included with their user plans.
Unassigning a number
It is important to note that the main company number you selected during sign-up will not show up under the Unassigned number list because it is already assigned as the company number.
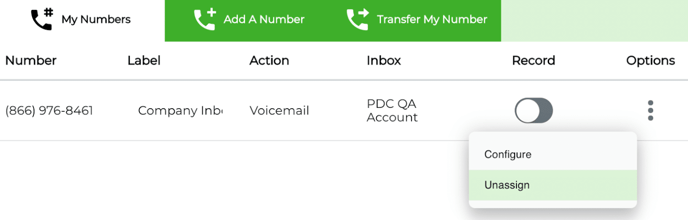
If you wish to assign your main company number to yourself or another user, navigate to the Numbers app and unassign the number from the current configuration, then return to the Users app and assign the phone number as a direct number.
Extension
The extension column will show you the internal extension number that has been assigned to the user. These numbers are solely for user-to-user calling and do not appear on any caller ID or company directory. The extension numbers are automatically assigned but can be changed by accessing Advanced Settings.
Meetings
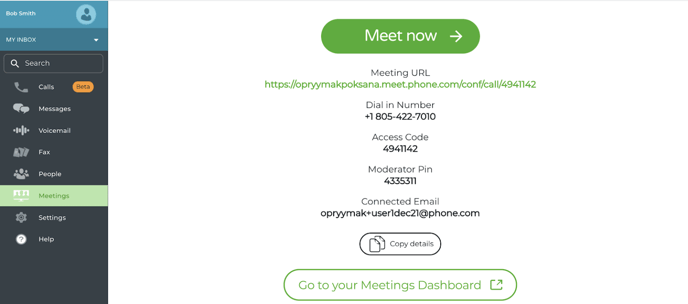
Each user will have a bridge ID that can then be selected to open the video conference on a separate tab for ease of access.
Users will see the screen shown below when accessing My.Phone.com, and will be able to start video calls and join on an audio bridge.
Additional settings are available by clicking on the ‘Go to your Meetings Dashboard’ button.
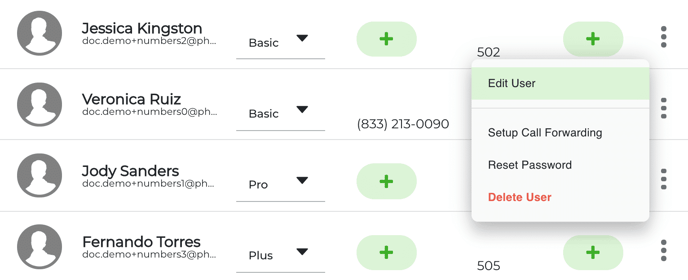
Action Menu
The action menu can be found under every user (located on the far right end of the user entry) it looks like three vertical dots lined up and, when selected, offers a list of options depending on if the user is regular or admin.
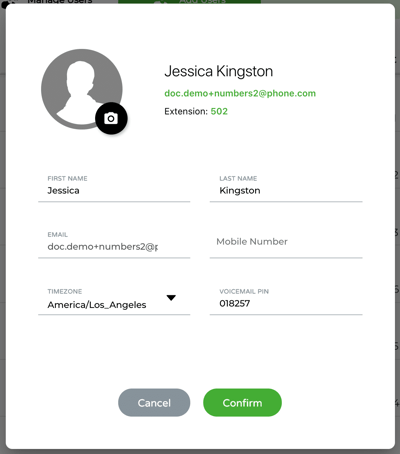
Edit user
Selecting the Edit User for any user will allow you to edit the existing user info. This info includes the first and last name, email (when not joined yet), mobile number, timezone, and voicemail PIN. Simply edit the info, and once done, select the Confirm button to save the changes. Once saved, you should see the updated info under the My Users tab.
Setup call forwarding
Call forwarding allows you forward calls for a user to an external number (for example, the user’s cell phone). All user’s devices will still ring if you have call forwarding on (e.g. IP phone and Web app). You can only forward to 1 external number.
Setting up call forwarding is easy. Access the action menu and select Setup Call Forwarding and enter the phone number you wish to forward calls out to, and select the Save button.
Once a phone number is added, it can be removed by re-accessing the Action Menu and selecting the No option, then save.
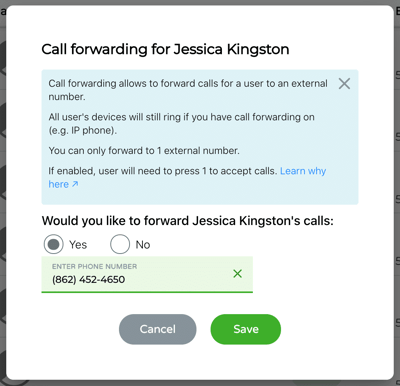
Important note: If call forwarding is enabled, users answering the call will have to press 1 to confirm they want to answer a call. This is called “call screening” and is required so that important messages do not end up in the personal voicemail of a user’s cell phone (and therefore not accessible by admins).
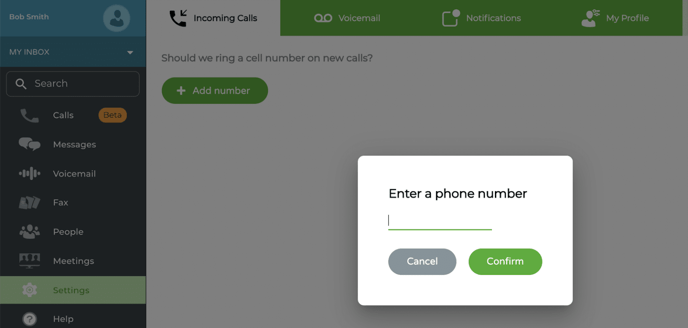
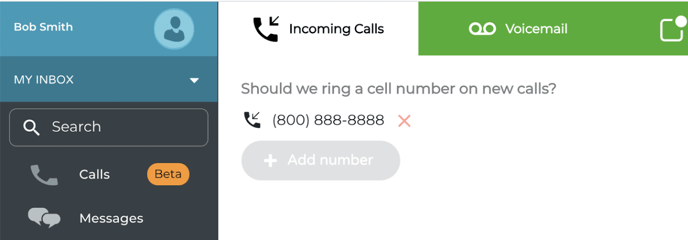
Users can change call forwarding settings themselves via their own user settings under the Incoming Call tab on My.Phone.com.
Reset password
Password recovery is done by accessing the Action Menu list and selecting the Reset Password option.
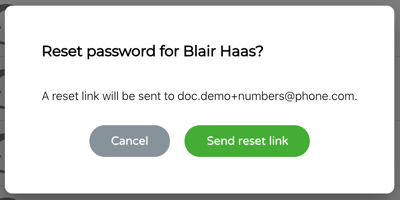
After you confirm the action, the system will send out an email to the user’s email address with instructions on how to change their password. Once this process is completed, the user will no longer be able to sign in using their old log in info.
Delete user
Removing a user from the system is easy. Select the Action Menu list and select Delete User. You will be asked to confirm the action, and once complete, the user will be removed from the account, and the plan for that user will no longer be charged to the account. If you wish to transfer valuable information such as voice messages, text messages, and fax messages, please visit the Advanced Settings section of the account.
Resend invite
If you invited a user but they cannot find the invite email, you can resend an invite to that user using this option. Make sure, however, that the user’s email address is correct. If not, click Edit User to change it before resending an invite.